
Project Spotlight
Jimmy DiResta demonstrates how to build a low-profile mobile base that makes heavy shop equipment easier to move while maintaining stability during operation.
SAFETY FIRST
Before you start any project involving welding, make sure you have the right Personal Protective Equipment (PPE), which includes, at least, an ANSI-approved welding helmet, safety glasses, appropriate welding gloves for the process you’re using, and a flame-resistant shirt, jacket, or sleeves to protect from UV rays and burns. You should also keep a fire extinguisher close at hand. Use adequate ventilation when welding. Use an approved respirator if exposure to welding fume cannot be controlled, or if welding outside and natural air movement is not sufficient to keep welding fume out of your breathing zone.
WHEELS FOR A GIANT BANDSAW
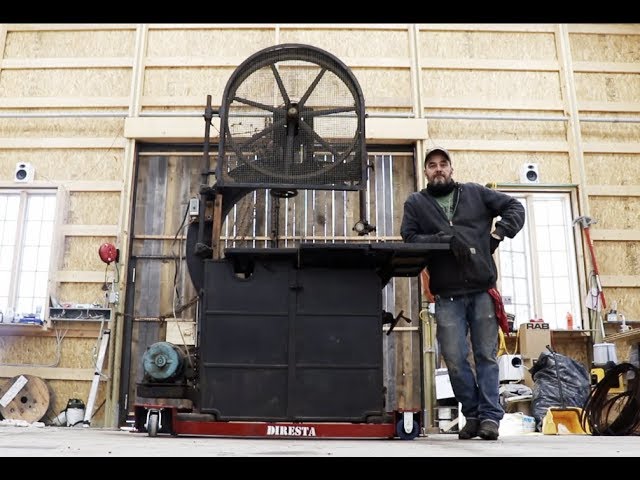
Over the course of his career, Jimmy DiResta has amassed and astonishing number of vintage stationary tools. But stationary tools are, by nature, difficult to move – and in a shop that’s constantly in flux, that’s not a good thing. In this Project Spotlight, Jimmy builds a mobile base for a vintage bandsaw weighing in at approximately 1500 pounds. Because this will be a working addition to his collection, he wanted to build a base that could be mobile so he could easily jockey it around his shop, but also be locked in place when in use. Also, adding an additional six inches or more to the working height of this saw would make it uncomfortable to use, so it had to be built low to the ground in order to be functional. To accomplish this task, Jimmy used a very limited amount of materials from his scrap pile, and welded everything using the flux cored process. This process and technique can be adapted for any large tool in your shop.
Step1: Cut and prep metal for the base frame
Carefully measure your tool’s base. Using a bandsaw or other metal cutting saw, cut lengths of angle iron to make up the length and width. Using an angle grinder equipped with a metal cutting blade, create lap joints by cutting out a 3-inch square piece from each mating piece.
Step 2: Square and weld the base frame
Using a large clamping square, clamp each corner together, first tacking, then finish welding as you go. Weld the horizontal as well as the vertical joints at each corner.
Step 3: Fabricate the “outriggers”
In order to keep the base of the bandsaw as low to the ground as possible, fabricate outriggers out of lengths of angle iron. Each outrigger is fabricated from two pieces of angle iron with a 3 inch filler piece in between. This can be adjusted based on the size of the caster you’re using. On the front outriggers, an additional angled piece is added to provide clearance, since the front casters swivel and the rear casters are fixed.
Step 4: Join the outriggers to the frame
Using total height of the casters as a guide, clamp the outriggers to each corner of the frame. Once welded in place, cap each outrigger with a piece of ¼-inch plate, cut to fit. These cap plates will be the mounting points for the casters.
Step 5: Mount caster to outriggers
Using a caster to mark the bolt hole locations, drill four holes in each outrigger cap to accept the mounting bolts. Remember that the fixed casters should be at one end of the frame and the swivel casters should be at the other end. Once the nuts and bolts are sufficiently tight, use an angle grinder to cut the bolts flush.
Step 6: Fabricate lifting plates
Now that the basic dolly for the bandsaw is complete and mobility has been established, it’s time to tackle the objective of keeping it stationary. Segment a piece of ¼-inch steel plate so that when cut, you’ll end up with four pieces, roughly 2 x 2 inches square.
Step 7: Drill and tap the lifting plates
Before cutting the segments, drill and tap a ¾-inch bolt hole in each segment. It will be easier to do now rather than later. As the ends of these bolts make contact with the ground, they will apply pressure against the floor of the shop to immobilize the bandsaw. Weld each of the lifting plates into place at the front and back of the dolly frame.
Step 8: Apply finish, add cradles
If you’re planning to finish your dolly, now is the time to do it. In order to distribute the weight of the tool to more than just the corners, take the time to fabricate cross members to act as cradles out of some scrap hardwood.
Materials
Main Frame: 3 x 3 x ¼” Angle iron
3/4 inch bolts
Hardwood for cross members
5 Inch casters, rated at 400 lbs each
WELDING/CUTTING EQUIPMENT AND TOOLS
Lincoln Electric Power MIG® 260
Flux cored wire
Large welding/clamping square
Drill
Angle Grinder
Cutting and flap disks
Welding/Cutting Equipment and Tools
Horizontal band saw
Precision® 225 TIG welder
Power MIG® 215MP welder
Torchmate® 4400 cutting table