
Resize a Motorcycle Gas Tank
Learn the planning, measuring, fabrication, and welding techniques required to reshape a motorcycle fuel tank for a custom motorcycle build.
SAFETY FIRST
Before you start any project involving welding, make sure you have the right Personal Protective Equipment (PPE), which includes, at least, an ANSI-approved welding helmet, safety glasses, appropriate welding gloves for the process you’re using, and a flame-resistant shirt, jacket, or sleeves to protect from UV rays and burns. You should also keep a fire extinguisher close at hand. Use adequate ventilation when welding. Use an approved respirator if exposure to welding fume cannot be controlled, or if welding outside and natural air movement is not sufficient to keep welding fume out of your breathing zone.
IMPORTANT!
Re-sizing a fuel tank should be done only on a new tank that has NEVER contained fuel.
Welding on a tank that previously contained fuel – even if it is currently empty – is extremely dangerous. It may cause a fire or explosion and result in injury or death. Special procedures must be used that are beyond the scope of this article.
After the re-sizing project is finished, the tank should be tested to ensure that there are no leaks.
How to Re-Size a Motorcycle Gas Tank
Anybody can modify a motorcycle gas tank. With a minimum of tools and equipment, and some careful planning and measuring, you can accomplish the job.
There are a couple different reasons to re-size a gas tank. A bike enthusiast might want a narrower tank to create a more sleek and streamlined appearance. Or a tank might need to be altered to create room for the rider or other components on the bike frame.
ARC Magazine joined Jesse Srpan, owner and principal fabricator of Raw Iron Choppers, as he takes us through the steps of modifying a tank for a recent build.
Step 1:
When preparing to modify a tank, cut out the mounts, bungs and vents. You’ll want the gas tank to be as flat as possible to get an accurate measurement of its full width.
I’m narrowing this tank, so I find its center line and mark it with a marker or pencil and masking tape. Use a grinder to cut three inches out of the tank from the center line (1½ inches on each side). Try to stay about three inches away from the gas cap bung so there is no interference when you weld. Remove the vent line inside the tank as well. File the tank to smooth out rough patches.
Step 2:
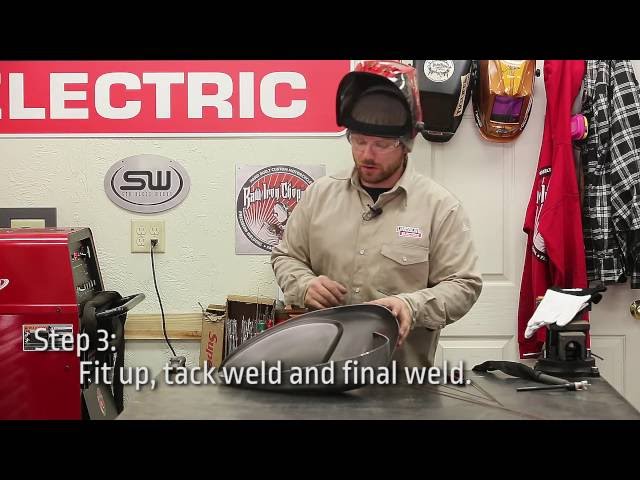
Bring both halves of the tank together to make sure they fit up before starting the tack welds. You might need to do some hammering before and during your tack welds to ensure the fit is true.
For this project, I started with .045 thick filler (ER70S-6). I like thinner material for this application, because I can add more without pushing through the filler rod. While I used 3/32 tungsten with gas lens, 1/16 tungsten can be used. The choice depends on your type of tungsten.
Using the calculation of 1 amp for every 1/1000 thickness, I weld at 55 amps, but you can set your amperage to 65 or 75.
Avoid rocking the tank while you tack weld. Doing so might cause a hole to burn through the tank.
Tap the tank while it’s hot to ensure a good fit. The fit-up is crucial. It has to be tight as your weld will pull both halves together. It’s important to remember to not directly hit the tack welds. This could potentially create dimples and low spots.
Make sure there’s good fusion on the tacks on the inside of the tank. You should be able to see the tacks go through the metal. You don’t want to weld the tank on top cold, nor do you want to see burn-through in a big area.
After grinding down the tack welds, you can weld from tack to tack, alternating from side to side to control distortion. When a tank feels like it is too hot, it will start to buckle, especially in the flat areas with no concave shape. That’s why the heat should be spread around.
Step 3:
After fully welding the tank, you can create the template for the bottom panel. You can create a paper template, or apply masking tape in a layered fashion across the width of the tank. Cut the tape in the shape along the edge of the tank’s bottom area, and then transfer it to poster board. Mark which side is the bottom to make sure there are no problems when you transfer the template back to the tank. Then cut the template out of the poster board.
Step 4:
When you’re comfortable with the fit-up of the template on the tank, transfer it to a steel plate. For mounting reasons, consider using a slightly thicker gauge of steel for the bottom, as compared with the tank. Using magnets to keep the paper template in place, outline the template onto the plate with a marker.
Step 5:
Before tack welding the bottom, it’s time to determine the tunnel layout and where you plan to place the fuel cap and petcock. The petcock is important because it holds reserve fuel that you might need, especially because you’re narrowing an already small tank. Because the tank will be narrow, be careful where you mount the petcock to avoid conflicting with the line of the tunnel. Once you determine the placement of the tunnel, you can turn your attention to the petcock. Doing the opposite (petcock first, tunnel second) might force you to cut your petcock and lose your reserve. Remember, narrowing a gas tank means lowering your fuel capacity.
Step 6:
To give yourself room to work when eventually placing the bottom, cut a square out around the perimeter of the template on the plate. Use Beverly shears, which cut on an angle, to make the template (make sure you cut outside the marked lines) and aviation snips to clean the edges.
Line the bottom up with the tank, remembering to mark which side is the top and bottom. Each side is different, and if you place the wrong side on the bottom and begin to tack weld without checking, there will be a gap on one side and overhang on the other.
Step 7:
Fold the original paperboard bottom template in half and scribe a center line. This will help when you place your tunnel. Eventually, you will transfer that center line onto the bottom plate.
Step 8:
After grinding the edge of the bottom, begin tack welding at the front. A screwdriver can help push in or pull apart the corners to square them up. Again, make sure the tank stays as still as possible and doesn’t rock. Rocking could cause the arc to pop while you’re welding. Complete the tack welding, followed by the full weld using your desired amperage. Make sure to have a nice bead and good lap over where you stop and start.
Step 9:
It’s time to work on the tunnel, which can be fashioned by using bendable exhaust tubing. You can show as much – or as little – of the tunnel as you want. How much you want to show determines the length of the cut. In my tank, I want to show a lot of the tunnel, so I’m going use half the tubing, cutting lengthwise. Take the piece of tubing and place it on the bottom of the tank to measure and mark the length. This will also allow us to measure and place our radiuses. Cut out the area that will hold the tunnel, as well as the front and back radiuses. Mount rubber on the tank’s frame so the tunnel doesn’t rest directly on it. Place the tunnel in the cut-out area and tack weld, followed by a bead on each side to bring everything together.
Step 10:
The tank is ready for the gas cap and petcock. While it’s your choice as to where to put the gas cap, remember that the placement will affect fuel capacity. Placing the cap too far back on the tank might mean the bike gets less fuel.
The petcock’s screen can be removed, and it can be cut at an angle. All you need is the inner diameter to fit into the tank. The measurement can be taken on the inside or outside of the petcock. Again, the petcock can be inset anywhere in the tank as long as it does not interfere with the tunnel.
Narrowing a gas tank requires patience more than anything else. You can’t rush through and expect the tank to survive. It’s about measuring, symmetry, layout and, of course, welding. Laying down a quality weld is the most important step because you don’t want your tank to eventually crack, especially after applying an expensive paint job.
But narrowing a tank can be a fun project, one that will help you enjoy your custom bike for years to come.
Materials
Unused steel fuel tank
16-guage steel plate for tank bottom
Exhaust tube for tunnel
Welding/Cutting Equipment and Tools
Lincoln Electric Precision TIG® 275 Welder
Lincoln® ER70S-6 TIG filler, .045 inch
Argon gas
1/16 inch or 3/32 inch thoriated tungsten
#7 cup with gas lens on a #20 water-cooled torch
Hammers
Aviation snips
Professional-grade scribes
Marker pen
Compass
12- and 15-inch scales
Pneumatic angle grinder
Masking tape
Clamps
Magnets
Vice grips
Cut-off wheel
Flathead screwdrivers
Beverly shears
Non-chlorinated brake cleaner